Her finder du løsninger på enkeltstående fejl, samt vejledninger indenfor opsætning og betjening af AutoPilot.
HowTo
Install a Remote Desktop
Firstly you have to install a remote desktop on your Mac.
You do this by opening your App store. Find and install the newest version of Microsoft Remote Desktop. You must have your Apple ID ready when you install the program.
Choose ‘Keep in dock”.
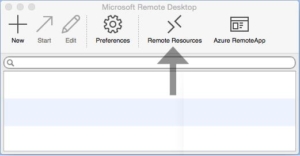
Configure Remote Desktop
Start Remote Desktop and choose Remote Resources:
Type in:
URL: https://saas.autopilot.dk/rdweb/feed/webfeed.aspx
User name:cloud\[your username]
Password: [your password]
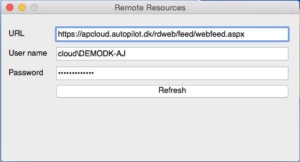
Press ‘Refresh’ and close the window.
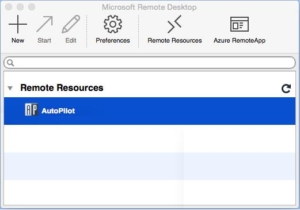
The available applications are shown. Choose AutoPilot.
Daily Use
Open Microsoft Remote Desktop and choose the AutoPilot Menu bar (also known as the Palette) from the list of Remote Resources:
How do I access my files?
AutoPilot produces various files – PDFs, link files for your accounting system, mail merge files, and so on. To use them, you must copy them from the Hosted location, to your local machine.
You have access to the files on the hosted location in the AutoPilot Menu bar. When you open the AutoPilot Menu bar, they are in the top menu bar, in Files > Company folder (a folder that the entire company has access to) OR files > My folder (folder which only you have access to). All Invoice copies will automatically be placed in the Company folder > PDF Invoicing. Please let us know, if you would like to limit the access to this folder, to specific employees.
The files can be copy/pasted to your local machine, as you typically would. This is done by moving the files from the hosted location (in the picture below, this is ‘DEMOUK’), to your Mac’s home folder (in the picture below, this is ‘home on Korsgaards-Mini’).
![]()
How do I change the language?
The serve will, as a default, attempt to guess which language your system is. This guess, however, is not always correct. To change the language, you go to the AutoPilot Menubar, choose ‘Set’ in the top menu bar, choose [Windows Language] and adjust your settings.
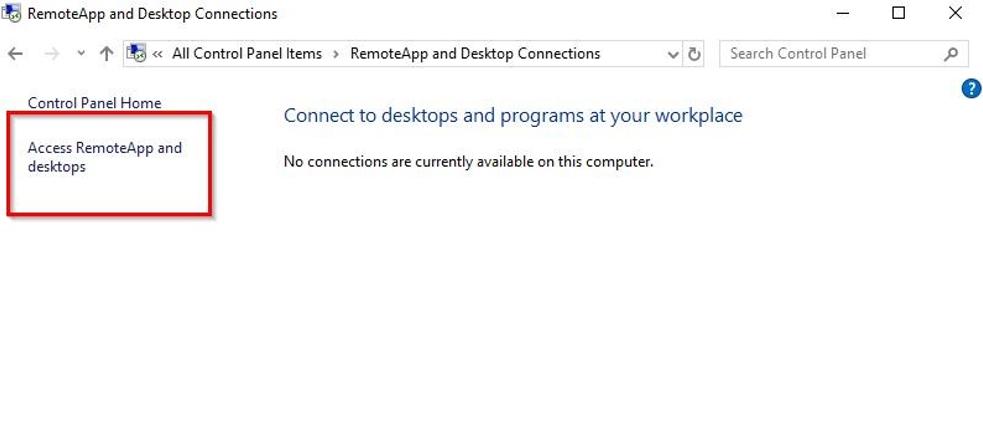
Accessing your AutoPilot on Windows 10, is done by following these simple steps.
- Access the Control Panel on your PC.
The easiest way to do this is to click on the start menu or in the Cortana bar and type in ‘Control Panel’.
- When the Control Panel opens, locate the RemoteApp and Desktop Connection.
- When the RemoteApp and Desktop Connections configuration window opens, locate the Access RemoteApp and desktops link on the left pane.
- In the window which appears, you will be asked to enter connection details. Type in the following URL and click Next.
URL: https://saas.AutoPilot.dk/rdweb/feed/webfeed.aspx
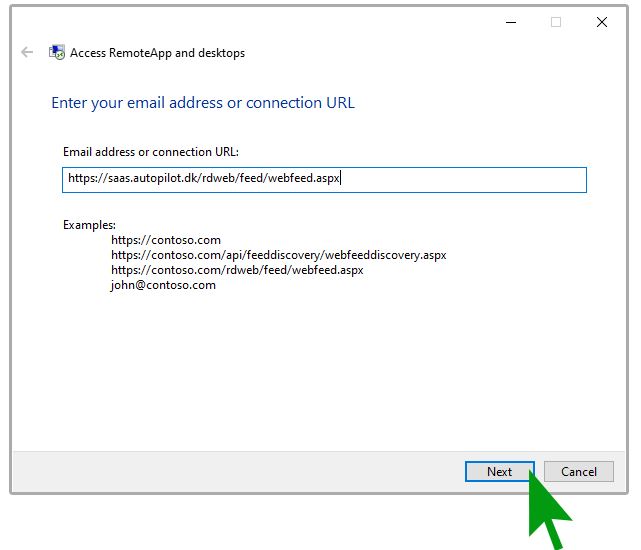
- When you have clicked next, the window will change and provide information regarding the connection.
Click Next to continue.
- The connection will be added and your computer will attempt to connect to the remote site via your Internet connection. If you receive any errors at this stage, please check that your connection to the internet is working.
- Once the connection to AutoPilot has been established, you will be asked to enter your username and password. Please make sure that you enter your full username and correct password.
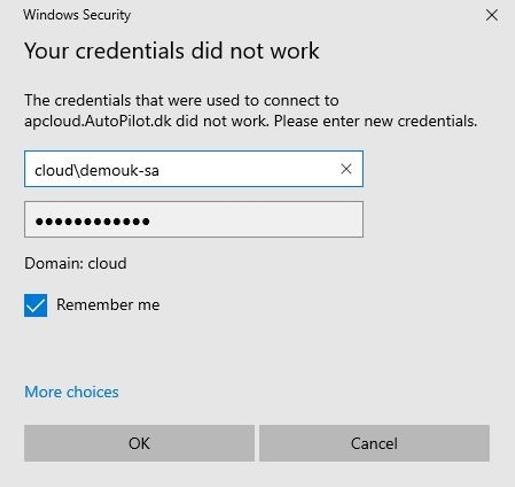
- Check the box ‘Remember me’ – this will save your username and password for future use.
- Once your username and password have been successfully validated, Windows will configure the RemoteApp and download the required details to your computer.
- Click Finish to complete the set up.
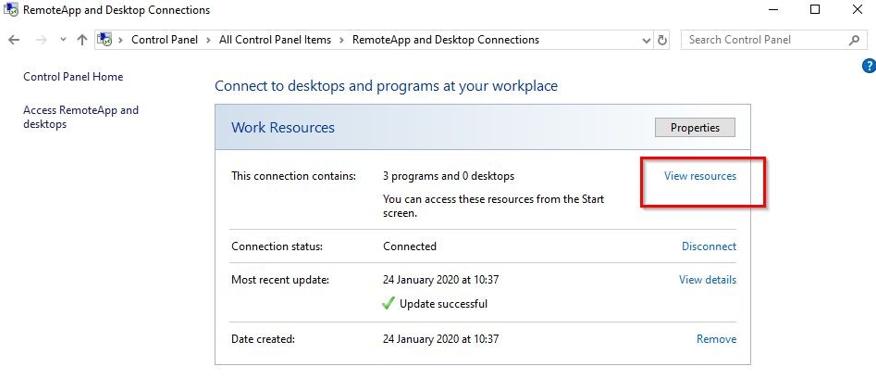
- Now that the connection has been made, the remote desktop must be accessed. This can be done in two ways:
- Click View resources on the control panel window, that has opened.
2. Click on the Start menu and then select All Apps . Applications are listed in alphabetical order, so navigate to the R section where you will find RemoteApp and Desktop and click on it.
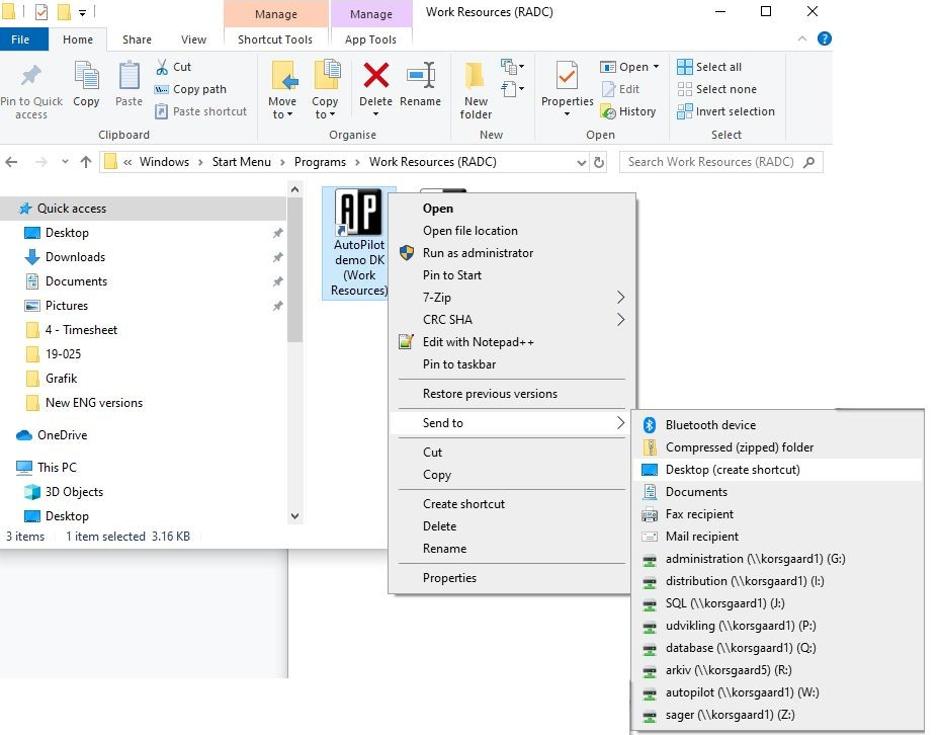
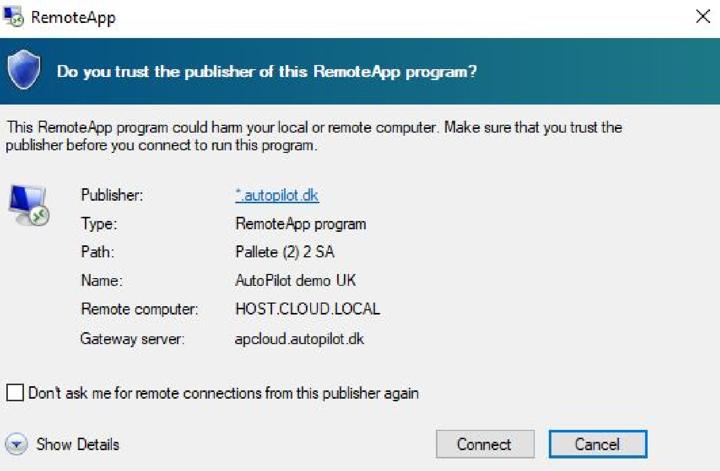
- To connect to AutoPilot, simply click the link with the AutoPilot icon.
- By clicking the ikon, your computer will connect to our Remote Desktop servers. Click Connect to start the session. Once the connection is complete, you will see The AutoPilot Palette.
- To save the AutoPilot RemoteApp on your desktop, right click the icon and choose Send to > ‘Desktop’.